

Table of contents


No headings in the article.
If you’re new to SSMS, you’ve probably had some errors while importing data. Don't worry, it happens to the best of us! At the end of this tutorial, you’ll be able to import a CSV file into SSMS without any issue. You can apply the same steps for an EXCEL file. I’ll be using the popular titanic dataset for this tutorial, this is going to be beginner friendly;
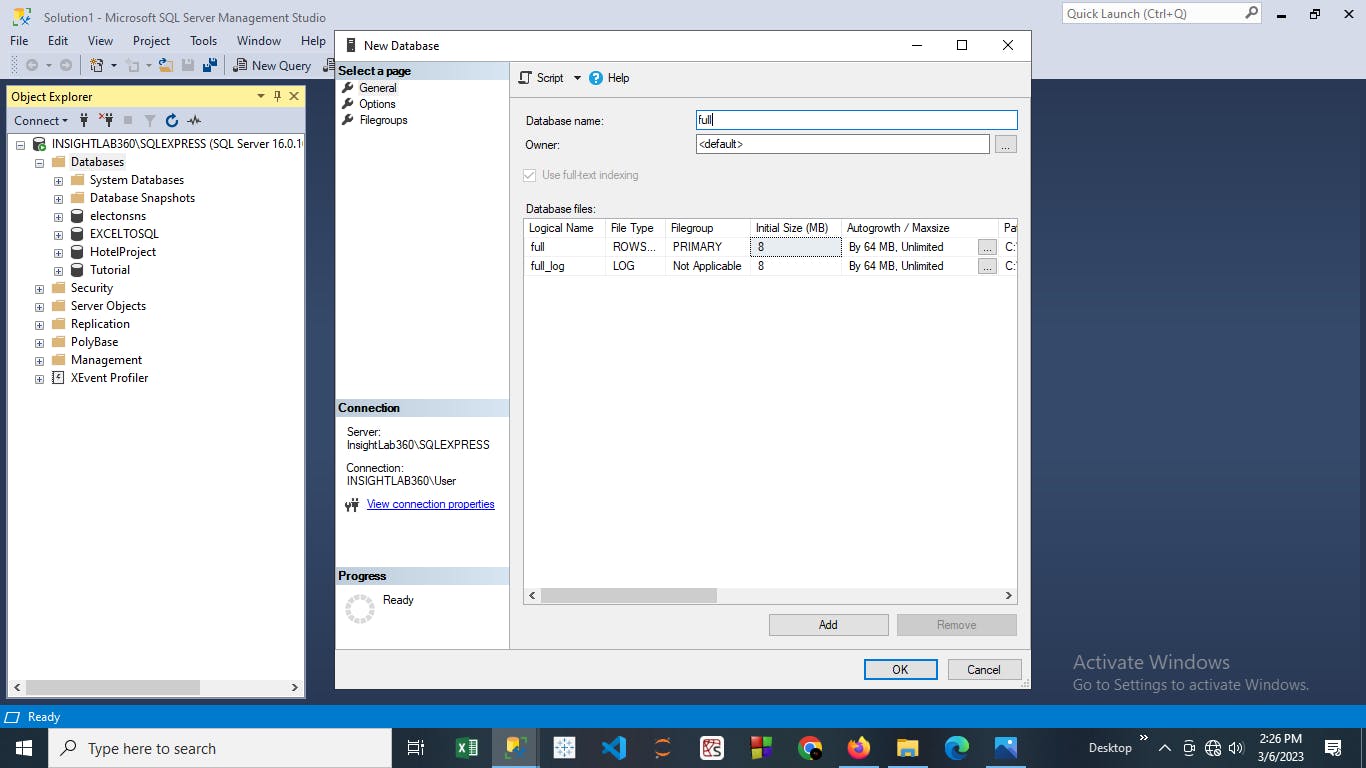
STEP 1: CREATE A NEW DATABASE.
- Right-click on the Databases and click on New Database.

STEP 2: SELECT A NAME FOR THE DATABASE.
- This step is really important, make sure your Database name is the same as the file you want to import. Here the name of the file I want to import is “full”. Click the OK button when you’re done.
STEP 3: IMPORT THE FILE
- Once you’re done, the new database is going to appear under the databases. Right click on the new database (full), click on task, then click "Import Data....".
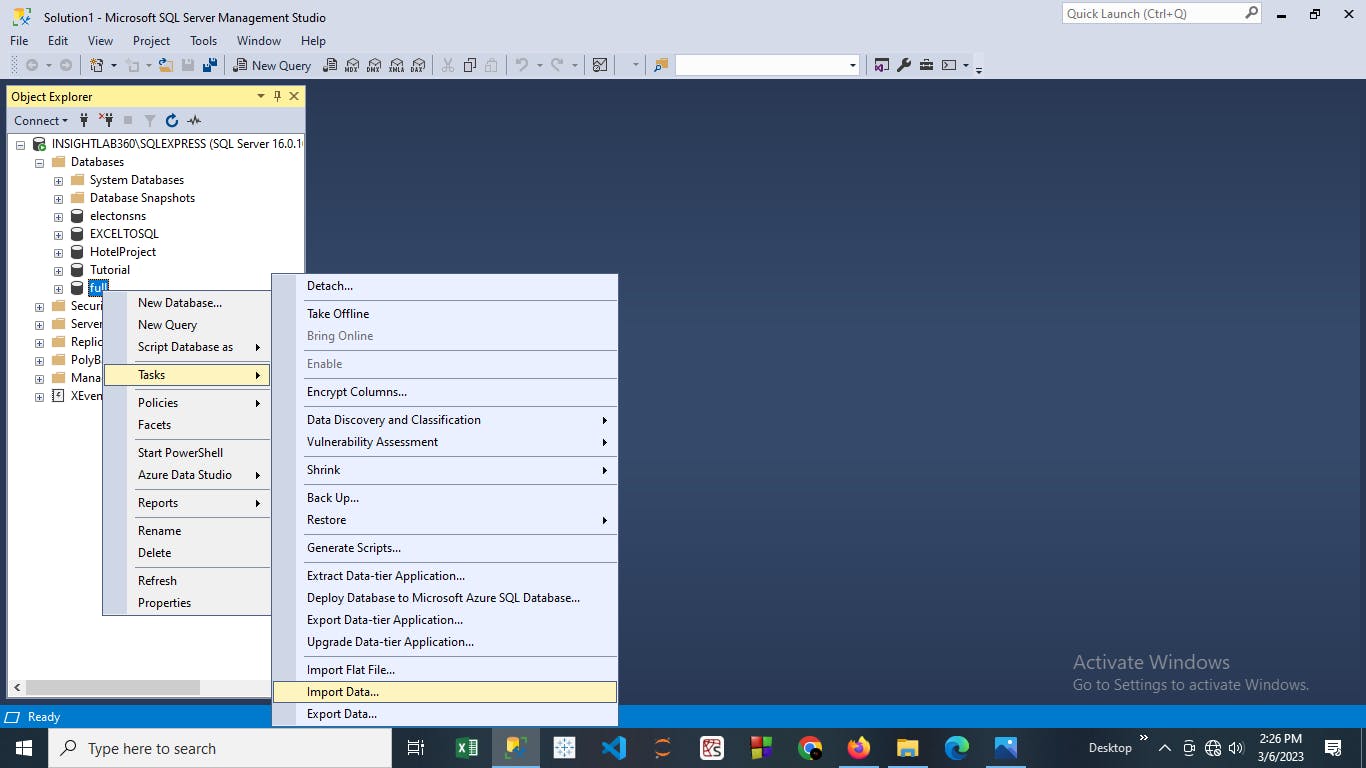
- Click Next>

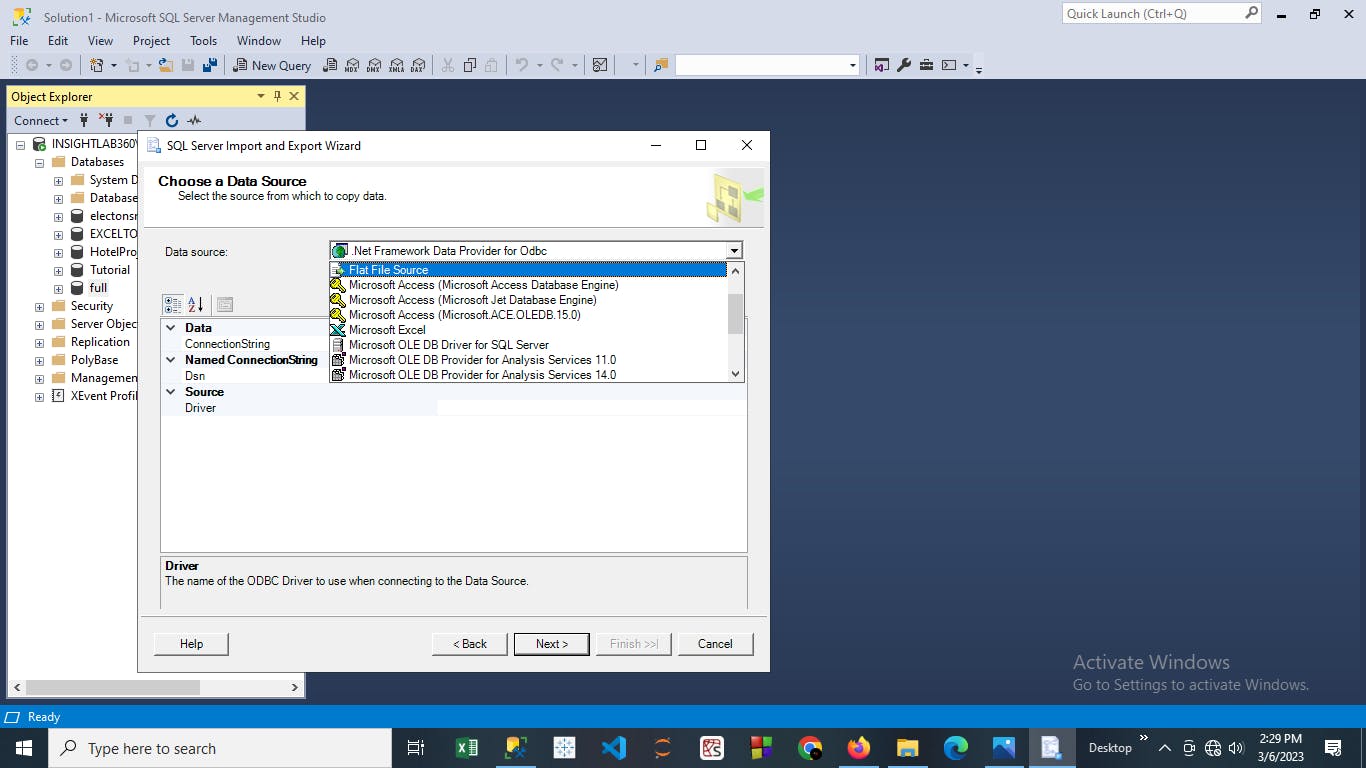
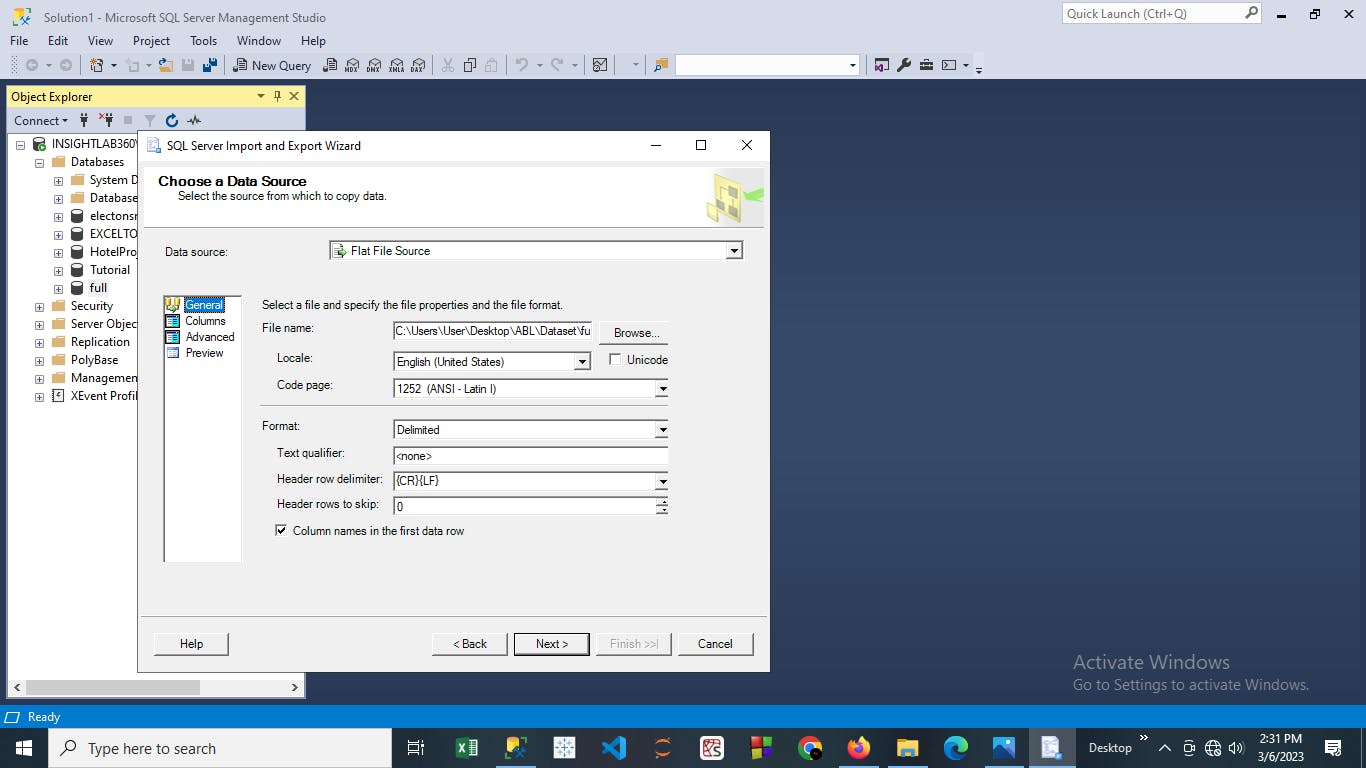
STEP 4: SELECT THE FILE SOURCE.
- For CSV file, select the “Flat File Source”; Select “Microsoft Excel” for Excel file. I’ll be selecting the “Flat File Source” since I’m working with a CSV file. Click Next>.
- Click the Browse button, go to the folder where your file is located. Click on CSV files (*.csv) if you’re working with a CSV file; Click on All files (*.*) to select the type of file you are working with. I’ll click on the CSV files (*.csv) since I’m working with a CSV file.

- Select the file you want to import then click Open.

- Click Next>
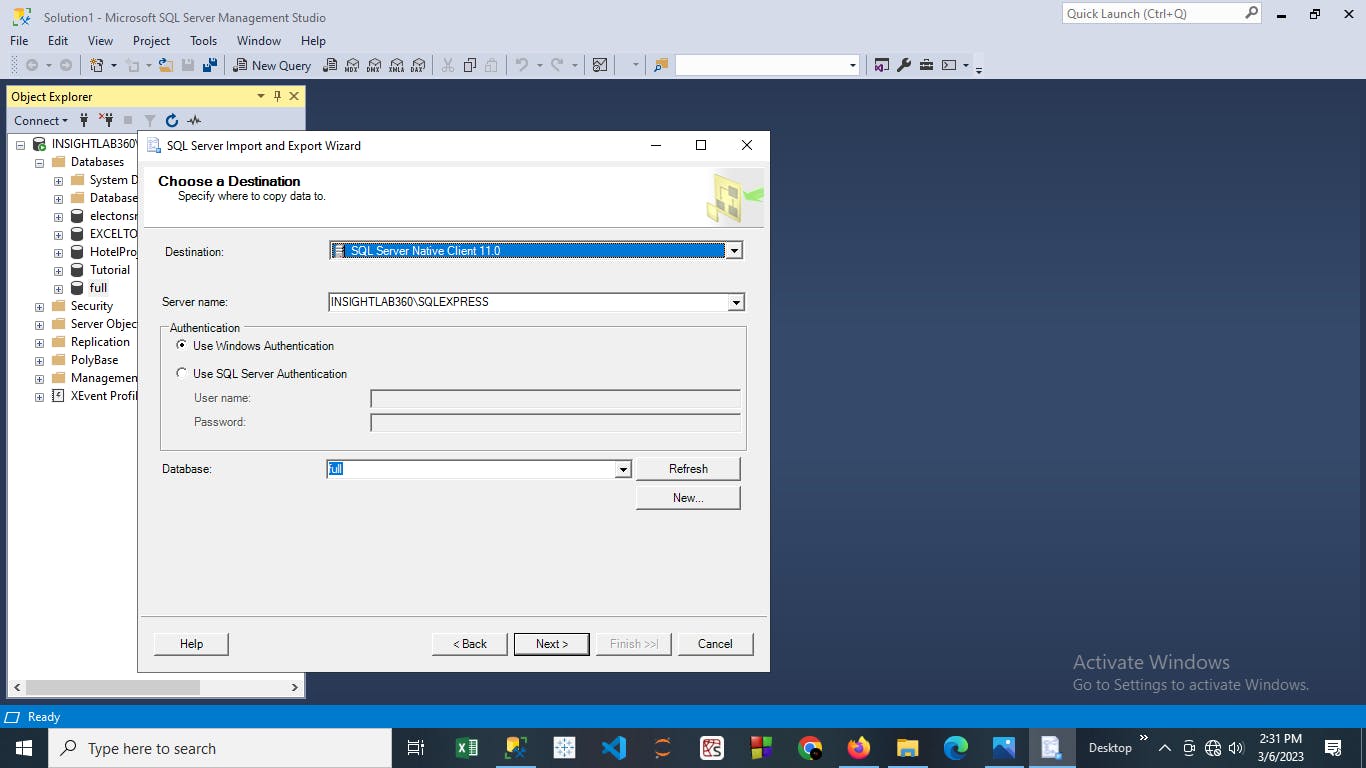
STEP 5: SELECT A DESTINATION
- Select the SQL Server Native Client 11.0 as your destination source. Click Next>

- Make sure the details here are correct. Click Next>
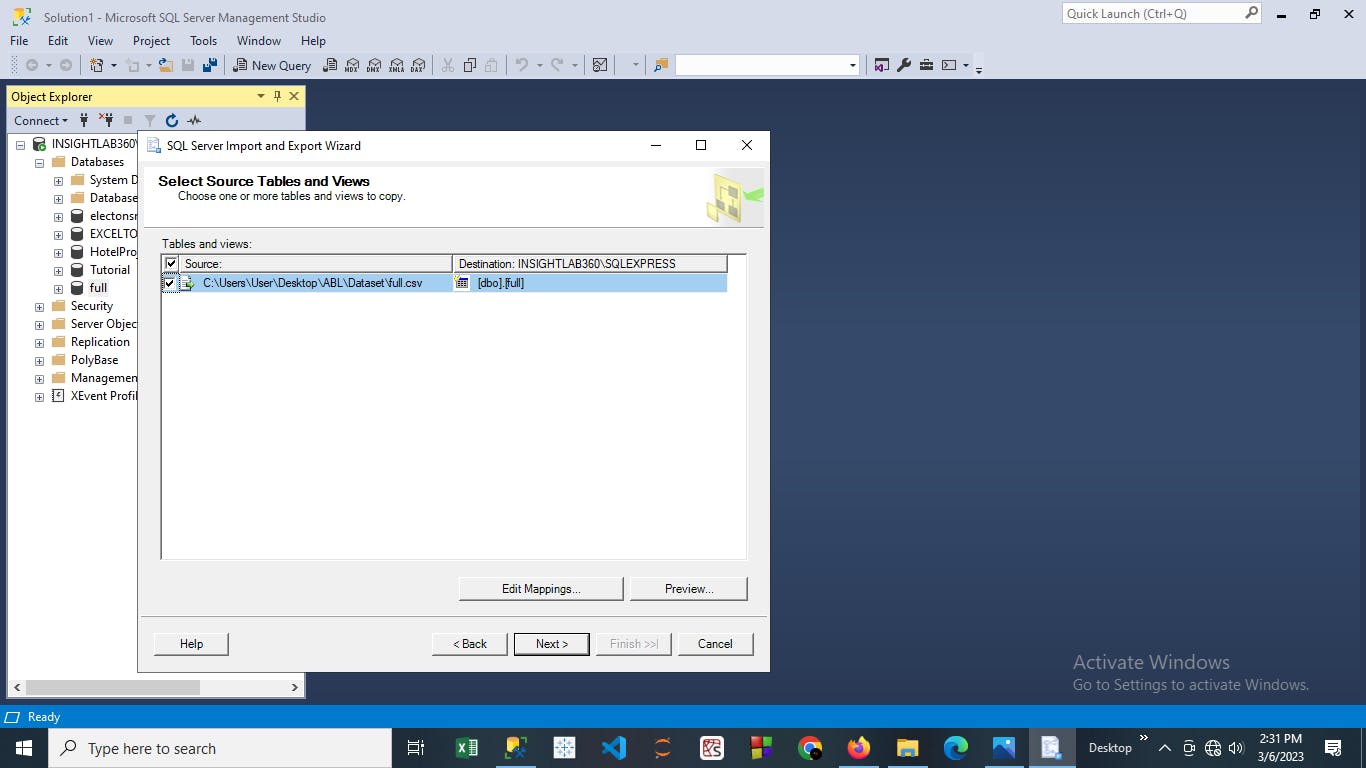
STEP 6: SAVE AND RUN THE PROCESS.
- Make sure the Run immediately option is ticked, Click Next>

- Click Finish

- If you follow the steps in this tutorial, you should get a message like this.

STEP 7: REFRESH
- Right click on the Databases and click Refresh. This process is important.

STEP 8: OPEN THE DATABASE
Left click on the database you just created. In my own case the name is “full”

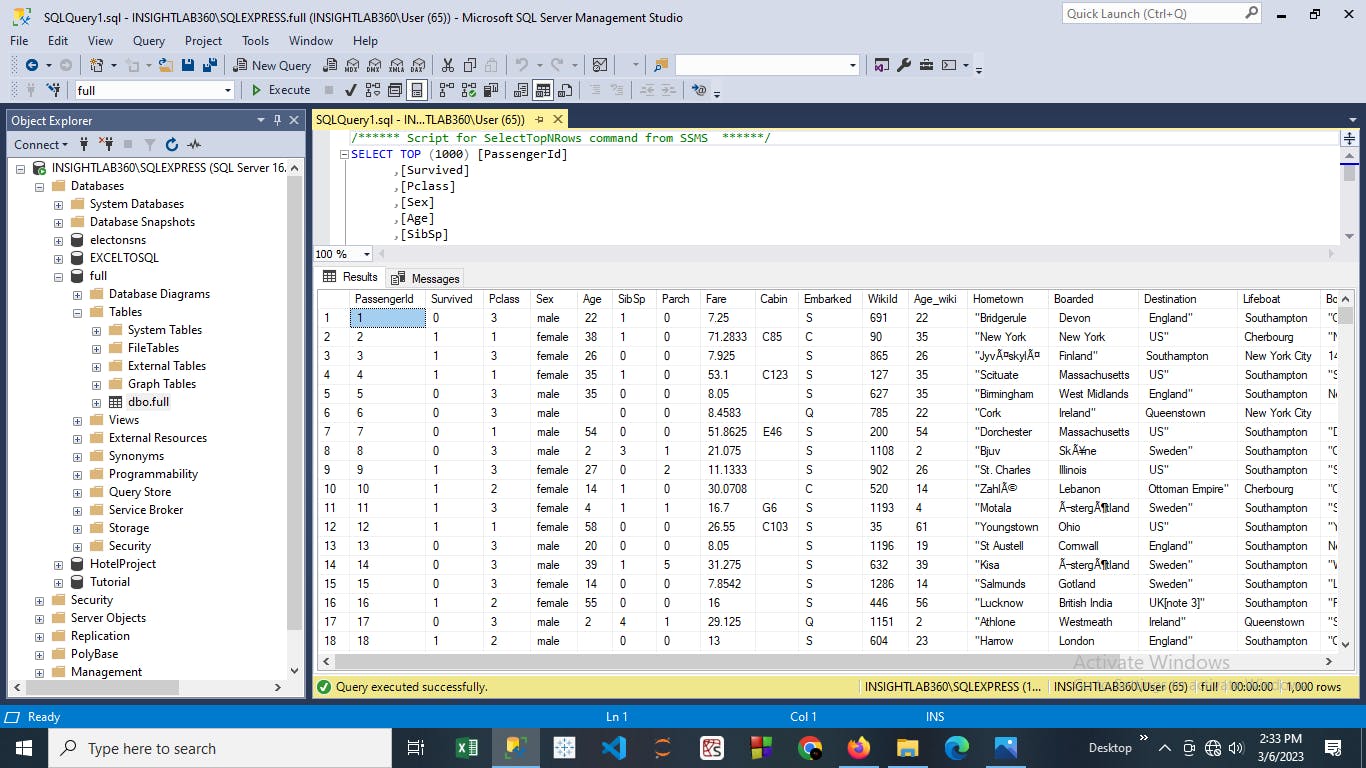
Right click on the table, then click “Select Top 1000 Rows” to view the file.
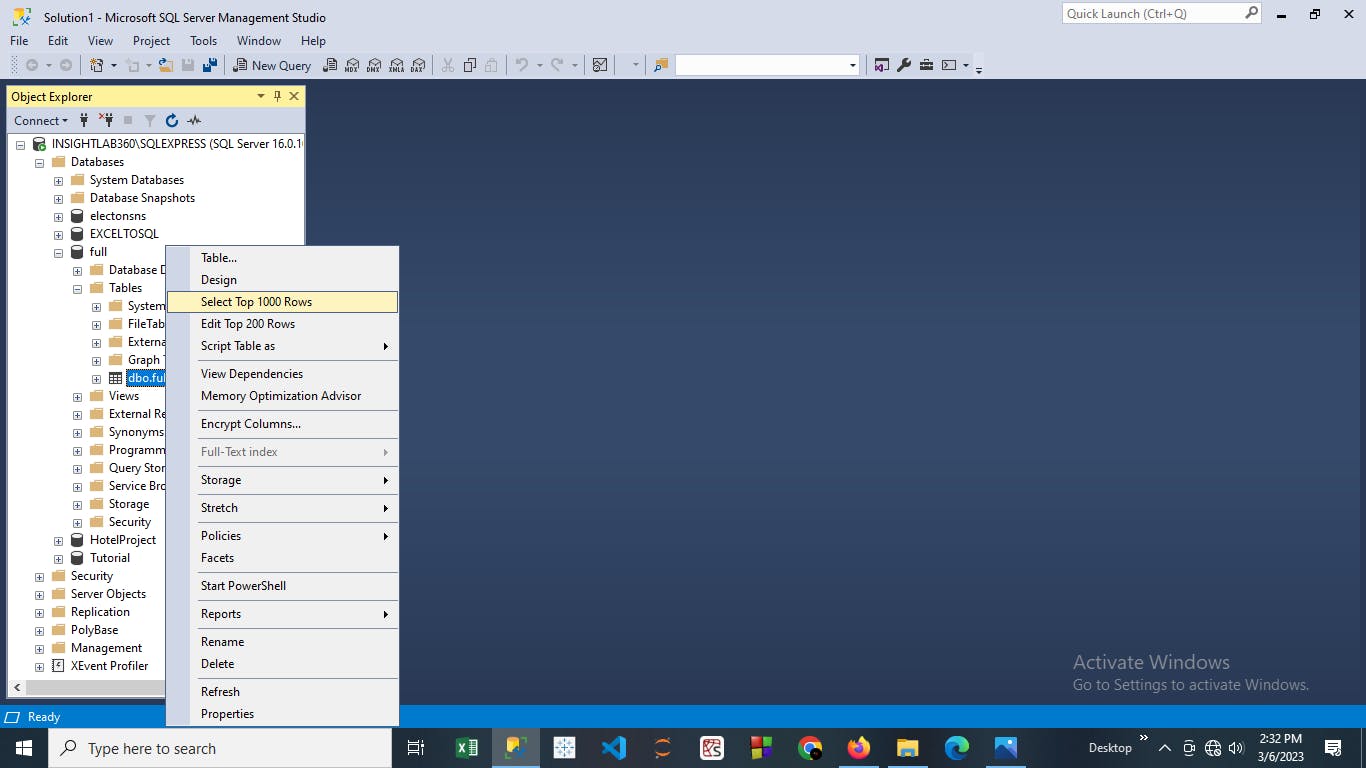
Viola! Your file is ready for querying.
If you enjoy content like this,follow me on Twitter, Linkedin, & Github.